ESP8266 is a low cost (2-3$ in begin of 2019) WIFI microchip with a 80/160 MHz CPU, which will be used for a lot of DIY projects.
If you are looking for more powerful microchip, or you need Bluetooth capability, check out the successor ESP32.
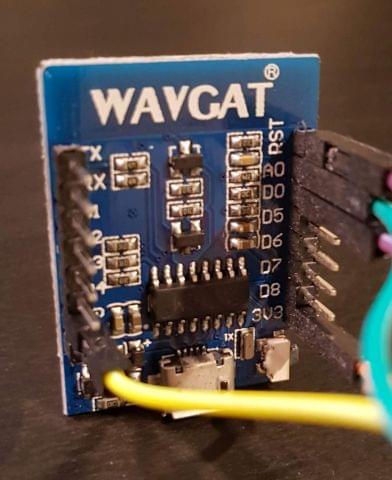
I bought the “D1 Mini” model of ESP8266 with 4MB flash (you can get them e.g. here).
Note: It is not the WeMos D1 Mini, but a copy of it. The PIN diagram is the same, which you can find here.
ESP8266 Firmware and Use Case Examples
There are many Firmware/SDKs for the ESP8266. My favorites are:
- Arduino - C++ based firmware
- NodeMCU - LUA based firmware
- ESP Home - Made for Home Assistant
- ESP Easy - Web based configuration for supported sensors/devices
You can find many great use cases for your ESP8266 (DIY Projects):
Arduino Setup
If you are used to Arduino IDE, you can use it for ESP8266 as well.
Install the Arduino IDE (if not already installed)
Steps for ESP8266
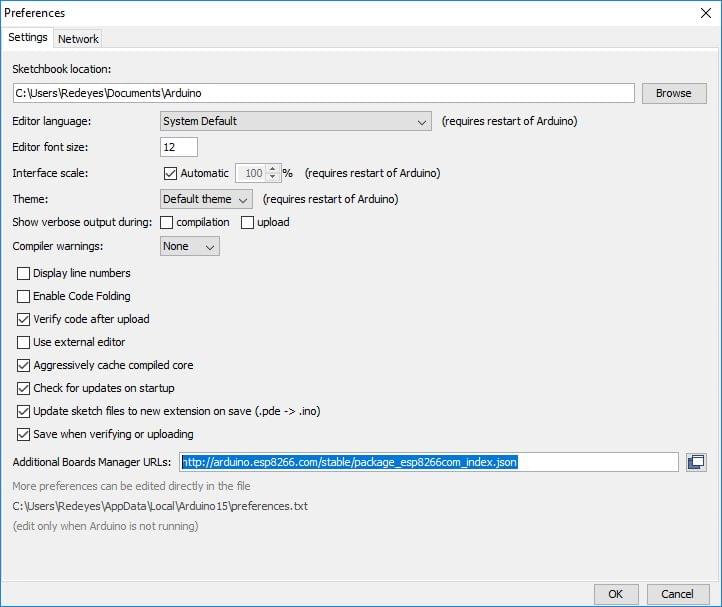
Go to File –> Preferences and add the link http://arduino.esp8266.com/stable/package_esp8266com_index.json to the Additional Boards Manager URLS.
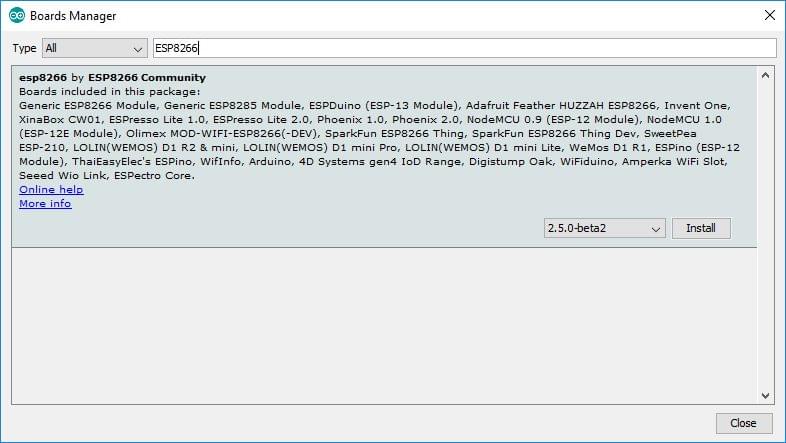
Go to Tools –> Board –> Boards manager
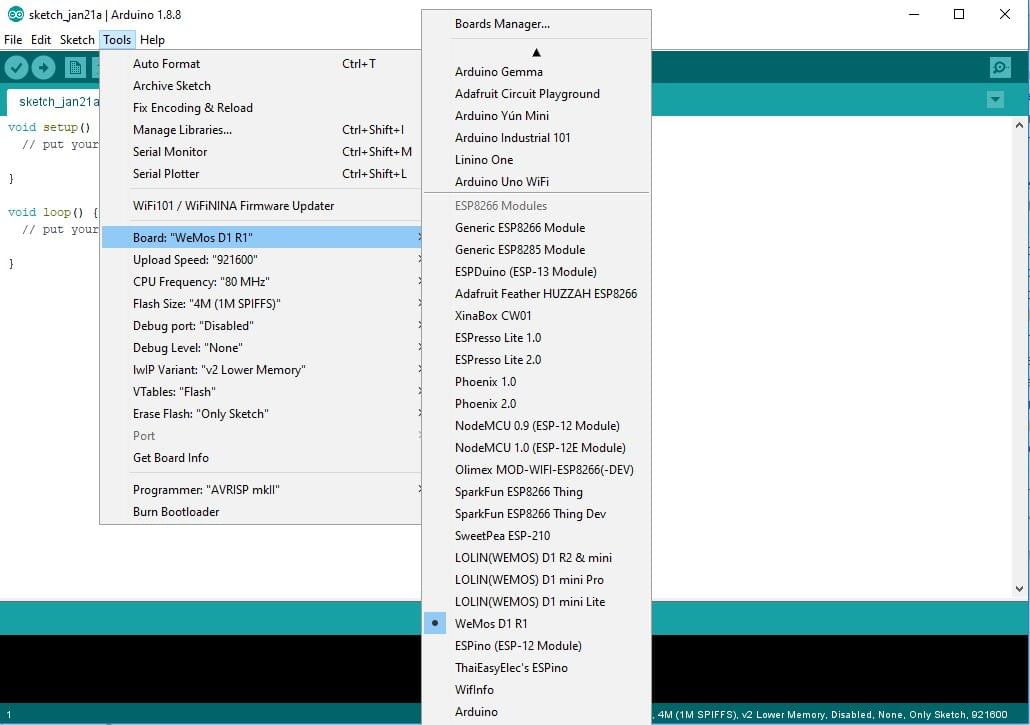
Select WeMos D1 R1 under Tools –> Board
Deployment with Arduino
ESP8266 library provides many examples e.g. mini web server or let your LED blink.
Just to test your ESP, you could directly deploy/upload an example from Arduino IDE to your ESP.
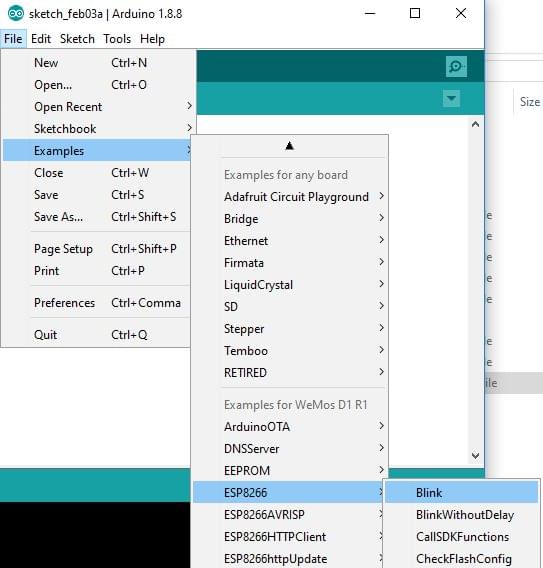
Let’s take Blink example:
- Go to File –> Examples –> ESP8266 –> Blink (a new window will be opened)
Connect your ESP with USB to your PC and click in IDE on the “Upload” button in the top-left corner.
You should see a blinking ESP LED.